Simultaneous display of product categories and menus
This tutorial applies to the avada theme and all themes that use the woocommerce plugin
The first thing to understand is: no matter what WordPress theme, using the woocommerce plugin, the product category is not synchronized with the theme by default, and needs to be manually added to the main menu and customized.
step 1:First set the product category (including sub-categories), enter "Product" - "Category" as follows
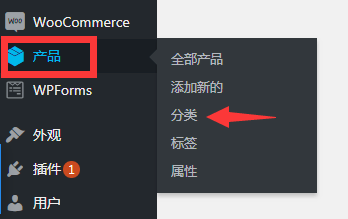
Set the product classification, pay attention to the primary and secondary classification, if it is not necessary to use the secondary, it is simple.
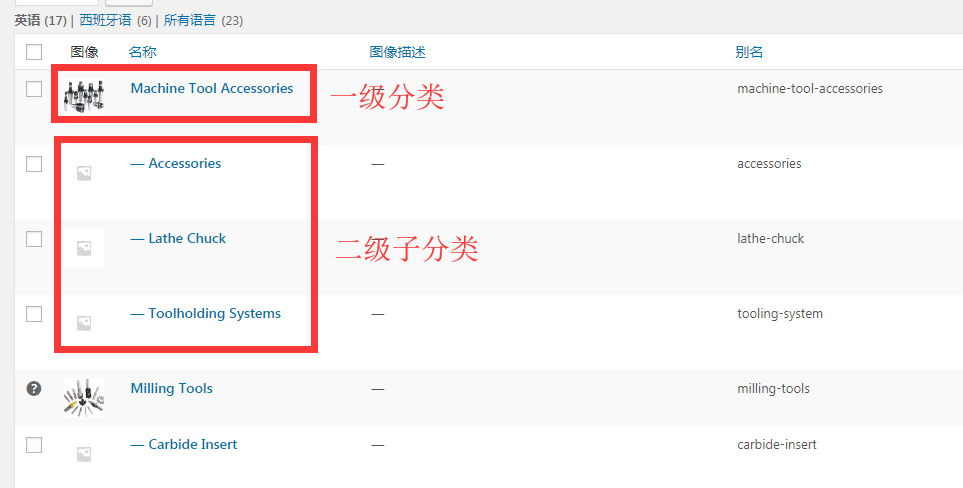
After setting the category
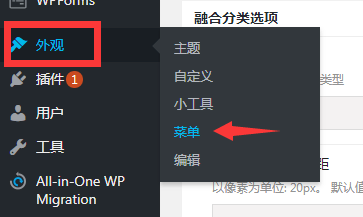
Step 2:It is necessary to add the new category to the corresponding menu. Go to "Appearance" - "Menu"
There may be several menus displayed in different positions, so select the menu you want to add to edit. If you are not sure which menu it is, please check the front desk of the website.
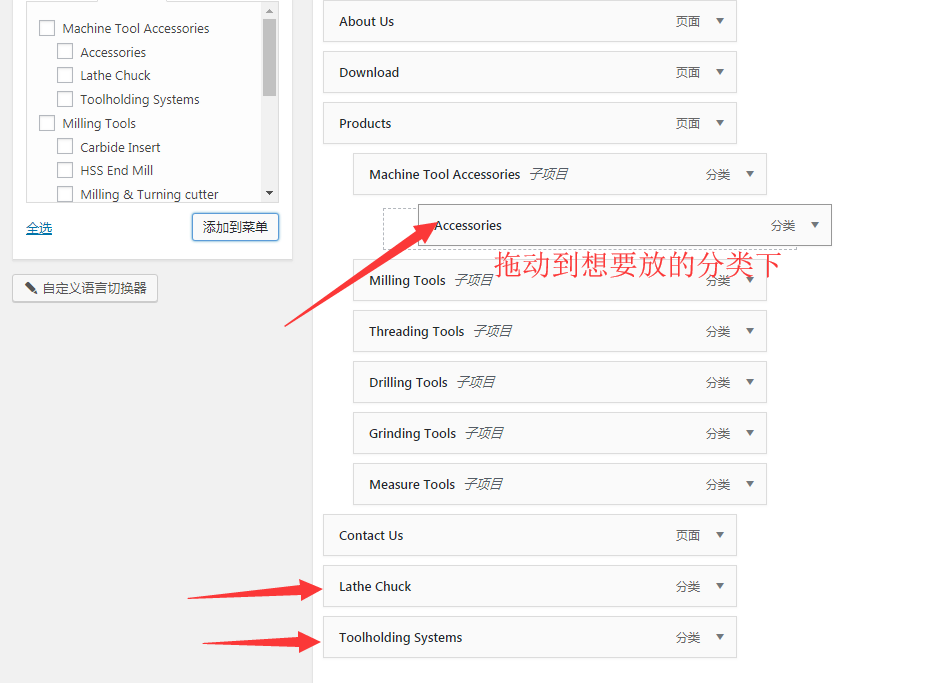
Find the product category on the left, select the category you want to add, and add it to the menu on the right
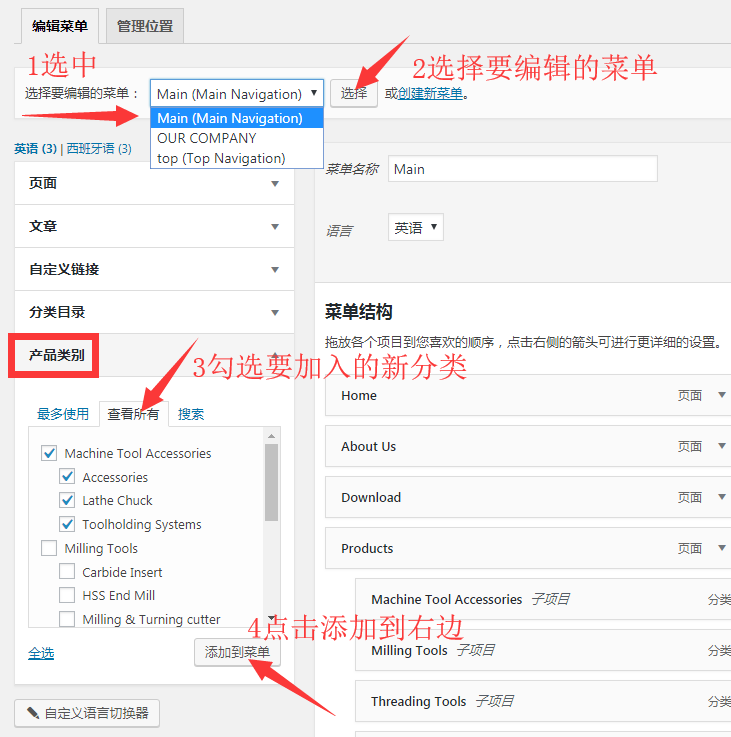
Step 3:Adjust the order and priority of the menu, manually drag it to the position you want, and finally remember to save the menu.
